- This lesson helps you get started with the basic steps required to create a Jamba application or applet. You will be creating an application that contains three objects: a Graphic object, a Push Button, and an Audio object. Ultimately, when you run the application the Graphic and the Push Button will be visible. When you click on the Push Button, the Audio object will play automatically. Setting up the three objects will build a good foundation of skills that you'll need for working with other types of objects. For more information on all of the available objects, see Chapter 6.
- Note that the simple example in this lesson is actually fairly representative of applets that you may want to create on your own. It is typical of the concise applets that many authors incorporate into their web pages. For more information on types of applets, applications, and design suggestions, see Chapter 8; Essential Design Concepts.
- Important: Make sure to complete every required step in this lesson (and in any other lessons you do later in the manual). Otherwise, the application will not perform as expected. Required steps are preceded with a bullet and the instructions appear bolded.
- A completed version of this lesson, called lesn_1, is located in the \Jamba\lessons directory.
- The New Project dialog box appears.
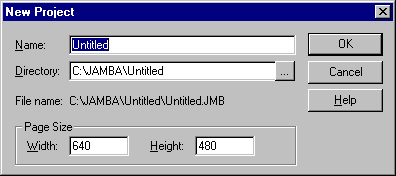
- This is where you name your application, decide which directory you want it to reside in, and set up the size of the window it will run in. If you name a directory that does not exist, Jamba creates it for you, along with a series of subdirectories in which you will store the files used by the application.
- Enter the name of the application file, in this case you'll call it MyApp, in the Name field.
- As mentioned earlier, when you save an application Jamba actually creates several files with different extensions (for example, MyApp.jmb, MyApp.html, and MyApp.jtf). However, you do not need to specify a file extension here. Jamba will append the appropriate extension for you.
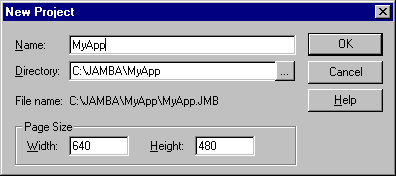
- Notice that as you type the name of the application, a directory with the same name is appended to the path in the Directory field. Later when you create your own applications and applets, you can optionally make further changes to the path in the Directory field.
- Click on OK in the New Project dialog box.
- When you click on OK, Jamba creates the required directory structure and opens a new project window. The following figure shows the contents of the directory when you name the project MyApp.
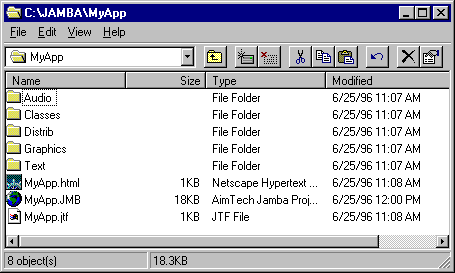
- Notice that several directories are created to store files used by your project. For example, the Audio directory is where you store audio files and the Graphics directory is where you store graphics. Also, Jamba creates the three files with the . html, . jmb, and . jtf extensions.
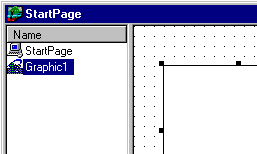
- When you start a new project, the first window that appears is called the Project window. It appears similar to the following:
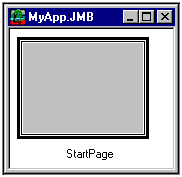
- The Project window is where you view a thumbnail (small representation) of the page that makes up your application. Initially, your application contains one page, called StartPage.
- The page in your project can be viewed in the Page Layout Editor. This is where you draw objects on the page and set up the objects to perform as desired at runtime.
- Double-click on the Start Page to open the Page Layout Editor.
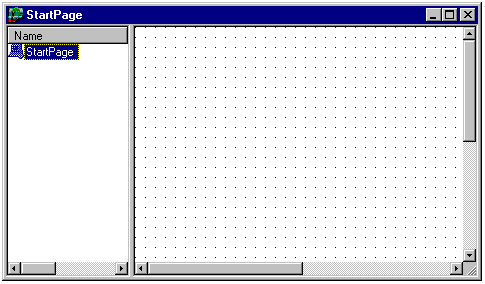
- The area to the left is the object list. At first it just contains the name of the page which is a type of object. Later it will contain the names of any objects you add to the page. The right side of the Page Layout Editor is the layout area. This is where you draw the objects on the page.
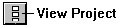
- If you plan to do some serious object layout work, you can maximize the Page Layout Editor. However, if at anytime you need to work in the Project window you can return to that window by clicking on the View Project button.
- For now however, you'll continue working in the Page Layout Editor.
- Initially, the window in which your application runs is 640 x 480. This might be appropriate for some applications however, for most applets, you are likely to want a smaller window. You could have changed this when you first created the project, however, we'll show you how to change this after the project has been created. Once you change the window size, the new size becomes the default for subsequent projects.
- Choose Settings... from the Project menu.
- The Page tab of the Project Settings dialog box appears.
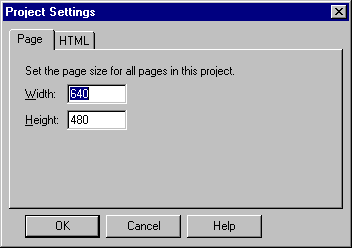
- This application will be 300 pixels wide and 200 pixels tall.
- Type 500 in the Width field and 200 in the Height field. Click on OK.
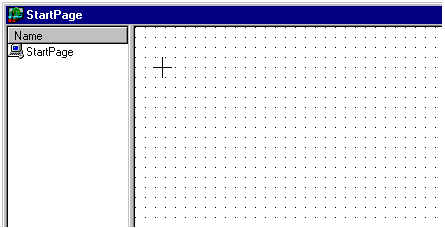
- The size of the drawing area adjusts according to the size you specify.
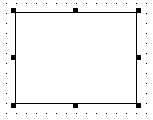
- First you'll draw a Graphic object. To draw an object you select the desired tool from the Object Palette (the vertical tool bar on the left side of the window) and draw a box in the Page Layout Editor. You don't have to worry about the exact position and size of the object because you can always change it afterwards.
- Note that if you position the cursor over a button and wait a moment, Jamba displays a tool tip to tell you the purpose of the button.
- Click on the Graphic tool in the Object Palette.

- Position the cursor near the top left corner of the drawing area.
- Press and hold the left mouse button.
- Drag down and to the right to draw a box.
- Release the left mouse button to finish drawing.
- The object appears similar to the following.
- Notice that each object you add to the page is also added to the object list.
- The object is named Graphic1 by default. If you add another graphic it will be called Graphic2, and so on. To change the name of an object, you would simply change its Name property. You'll learn how to set properties later in this lesson. However, in this application, you will use the default object names.
- Later in the lesson you'll load a graphic file into the object. But first you'll finish drawing the other objects. Now draw the Push Button to the right of the graphic.
- Click on the Push Button tool in the Object Palette.

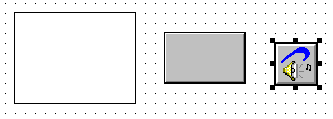
- Draw a Push Button to the right of the Graphic object so that the page looks similar to the following.

- Now draw the Audio object. You can draw it to the left of the Push Button, although the Audio object will not be visible at runtime.
- Click on the Audio object tool in the Object Palette.

- Draw an Audio object to the right of the Push Button so that the page looks similar to the following.
- Notice that the Audio object is always the same size and is never visible at runtime.
- As mentioned previously, all objects have certain properties (characteristics) that you set to control their appearance. The first property you set will determine which graphic appears in the Graphic object you drew.
- Right click on the Graphic object and choose Properties... from the popup menu.
- The properties for the selected object appear as follows.
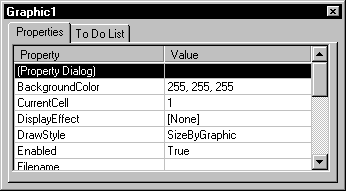
- This dialog box is called the Object Editor. The left column shows each property you can set. The right column is where you provide values for the properties. You'll use the Filename property to specify the graphic that appears in the object.
- Click in the Value field for the Filename property.
- An Open dialog box appears that lets you browse for the desired file.
- Find the file called gorilla.gif in the Jamba\lessons\Graphics directory and double-click on it.
- The file is automatically copied to the \MyApp\Graphics directory and is loaded into the Graphic object. The file has been copied to the appropriate directory. (If you can't read the entire value, you can position the cursor on the right edge of the dialog box and stretch it to the right to see more.)
- Notice also that the Graphic object has automatically resized to fit the graphic. This is because the object's DrawStyle property is set to SizeByGraphic by default. The other options are to Tile or Clip the graphic, but most often you want to show the image in its entirety.
- Before you move on to the Audio object, you'll set one more property of the Graphic object so that it uses a special display effect when it first appears.
- Click in the Value field for the DisplayEffect property.
- The DisplayEffect Properties dialog box appears to let you select a special effect.
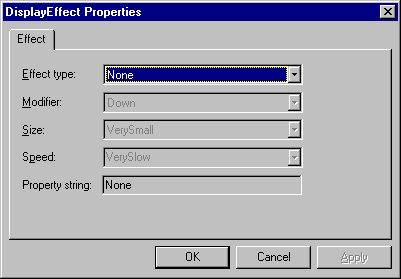
- Select Wipe from the Effect Type list.
- The Wipe effect sweeps the graphic onto the display. Now choose a Modifier to indicate the direction in which the Wipe should occur.
- Select Left from the Modifier list.
- You'll leave the Size set to VerySmall but change the Speed to be a little faster.
- Select Medium from the from the Speed list.
- Click on OK to close the dialog box.
- The selected information is automatically returned to the Value field.
- Save your work by choosing Save from the File menu.
- Next, you'll set up the Audio object to play an . au file called gorilla.au. You need to select the object in order to set its properties. You can select it by clicking on it, or you can click on the name of the object in the object list.
- Click on Audio1 in the object list.
- The properties list now shows the properties for the Audio object.
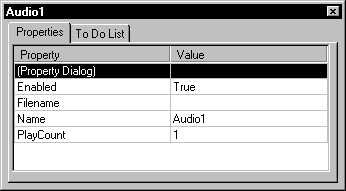
- Note that the Object Editor remains open until you deliberately close it by clicking the X button in the top right corner. It simply changes to reflect the currently selected object.
- Click in the Value field for the Filename property.
- An Open dialog box appears that lets you browse for the desired file.
- Find the file called gorilla.au in the Jamba\lessons\Graphics directory and double-click on it.
- The file is automatically copied to the \MyApp\Audio directory. The path and filename that now appear in the Value field for the Filename property show that the file has been copied to the appropriate directory.
- The next concept you need to learn about is the To Do List which is one of Jamba's most powerful features. It tells the object what it should do when a particular event occurs. Here are some typical uses for the To Do List:
- Change one or more objects when an event occurs.
- Example: When the user clicks on a Push button, its To Do List can cause a Text object to appear and also cause an Audio object to play.
- Change the object itself when an event occurs.
- Example: When a user clicks on a Graphic the object can disappear. Or, set up an Audio object so that when the page appears, the object receives a command to play.
- In this application, you'll set up the Push Button's To Do List so that when the user clicks on the button, the Audio object plays.
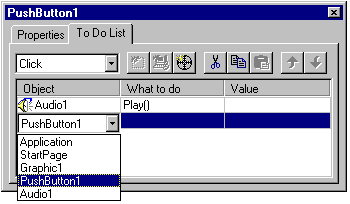
- Click on the Push Button and click on the To Do List tab.
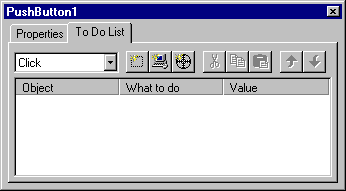
- The Event field (the drop-down list in the top left corner) shows the event that will cause an action (called a To Do item) to occur. By default it is set to Click.
- This default is appropriate because you want a To Do item action to occur when the user clicks.
- The blank area that makes up most of the dialog box is where you enter the To Do items that occur for this event. In this case, you'll be setting up one item to instruct the Audio object to play. However, in other situations, you might want several actions to occur when the user clicks. Note also that the same object can have more than one To Do List, one for each event that you select.
- Here's how to set up a To Do List item.
- Click on the New To Do Item button.

- A drop-down list opens in the Object field.
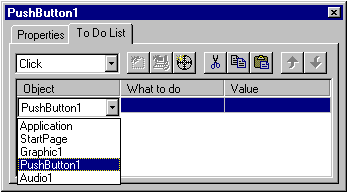
- The list contains each item that you potentially take action on when the user clicks on PushButton1: every object on the page, the name of the page(StartPage) and the entire application. You want to select Audio1 because that's the object you want to affect.
- Select Audio1 from the drop-down list.
- When you select Audio1, the list of possible actions appears automatically in the What To Do field.
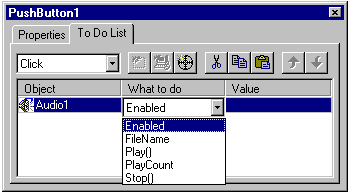
- The actions that are listed fall into two categories: properties and methods. The properties are the same kinds of properties (like Filename) that you can set for an object in its Property list. The other kinds of actions are called methods. Methods are special actions that command an object to do something, such as play a file. You can tell which actions are methods because they are followed by the "()" symbols. In some situations, because methods are commands, they do not require you to set the Value field.
- Select Play() from the drop-down list.
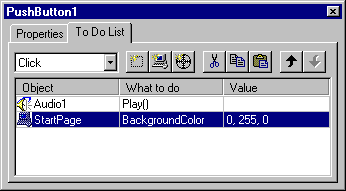
- You're finished setting up the To Do item for the Audio object. To get some more practice, next you'll set a property in the To Do List. Specifically, you will add an action that changes the background color of the page when the user clicks on PushButton1.
- Click on the New To Do Item button.
- A drop-down list opens in the second line of the Object field.
- Select StartPage from the drop-down list.
- The What To Do list opens automatically.

- Select BackgroundColor from the What To Do list.
- The Color dialog box appears to let you select a color for the page background.
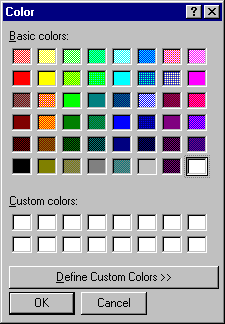
- Click on a color cell to select the color you want to use for the background and click on OK.
- The Color dialog box disappears and the corresponding RGB value is automatically returned to the Value field.
- Each number in the RGB value represents the intensity (from 0-255) of Red, Green, and Blue that make up the selected color. The last task you'll do is to label the Push Button "Click Here".
- Click on the Properties tab.
- Set the Label property to Click Here.
- Choose Save All to save the application and changes to the StartPage.
- Run the application by clicking on the Play Application button.

- Try clicking on the Push Button to play the audio.
- An "Applet Player" window appears and generates the window in which your application runs.
- To see an example of what the completed applet should look like, click on the Start button.
This is how you will test all of your applications and applets to make sure that they perform as expected. After you have tested an application, you can either distribute it, as is, to your end-users or you can incorporate the functionality into an existing web page (. html file). Your end-users can run the file in a Web browser such as Microsoft's Internet Explorer or Netscape or you can distribute the Application Viewer with the application. For detailed information on distributing applications, see Chapter 4: Managing Projects.


